My Instagram Feed

Wednesday, November 17, 2010

Lemon Bars


Another on my Christmas squares/bars list.

Lemon Bars (Betty Crocker)
1 c all-purpose flour
1/2 c butter softened
1/4 c icing sugar
Mix first 3 ingredients, and press into a 8x8 or 9x9 pan, building up 1/2 inch edge. Bake crust for 20 min @ 350.

1 c granulated sugar
2 tsp grated lemon peel, if desired (but strongly recommended! I love lemon!)
2 tbsp lemon juice
1/2 tsp baking powder
1/4 tsp salt
Beat remaining ingredients with electric mixer at high speed for 3 mins, or until light and fluffy (mine never really got light and fluffy, but it still worked out). Pour over hot crust.
Bake 25-30 mins or until no indentation remains when lightly touched in centre. Cool in pan. Dust with icing sugar. Cut into bars.


Read more...

Saturday, November 13, 2010

Vintage Sale

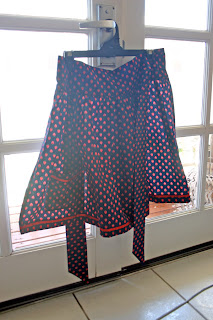
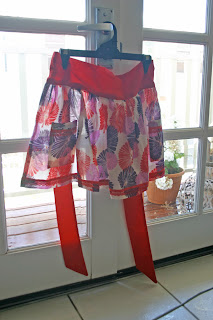
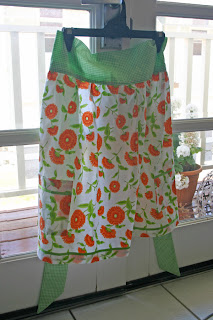
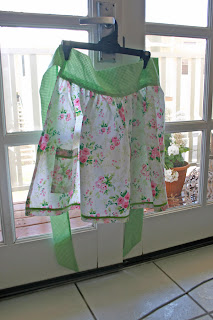
Last weekend I went with my sister-in-law to a little market she created with some friends. They've been collecting vintage clothes for a few years in the hopes of re-selling them at a later stage. She asked me to come along, and suggested I try selling cupcakes. I happily agreed, and after many long and stressful weeks with my normal job, I was able to do a trial run, and come up with some interesting flavours to sell. The week before, I ended up not having any work (the nature of my job, when it rains it pours, but then there are really dry spells in between), so I dug out the sewing machine and finished off some projects I had going, and started a few new ones to bring along too. It was a busy week, but it was so nice to be spending time creating things. I finished off a stash I had for making aprons, and also baby bibs. I also made some mini journal / scrapbooks too. Too bad having fun didn't translate into money for me though. I didn't sell a single item besides cupcakes, and only sold about 15 of those. So, for me, the markets were bust, but I think I know where I went wrong - I'm not much of a sales person it seems. We might be doing them again in a month, so I'll get my game on then (I tell myself).  And make a sign. No one really noticed me sitting behind my cupcake stand. Anyhow, here is what we came up with:

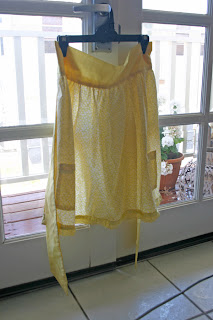
I made and finished off a bunch of aprons:


I made a bunch of new baby bibs from a classic vintage pattern:


I made a bunch of journals too, with stickers, and labels, and lots of different kinds of paper & envelopes.


Here is a page by page example, with repeat pages left out. There are over 70 pages of new and recycled, and some hand made papers to use for journaling, scrapbooking, or notes:


And then I made a heap of cupcakes (mocha, chocolate, vanilla, cotton candy/ fairly floss, key lime, strawberry & cinnamon roll), which were packaged in take-out containers:


Here are some shots from the markets:


Laura made some gorgeous hair combs & headbands too:


The girls had racks of clothes and shoes, there was so much stuff!


Read more...

Monday, November 8, 2010

Butter Tart Squares


These squares are fabulous!! I got this recipe from a lovely blog called Intimate Weddings.


Finally, a truly Canadian recipe I can make with ingredients solely from Australia. Most of my favorite Canadian recipes are not possible if you live in another country. Except, I did see an Australian version of a Nanaimo Bar published in a magazine a few weeks ago, which I will need to try one of these days and do a little comparison. But for these lovely squares, there are no Graham crumbs, Crisco shortening or Rogers Golden Syrup needed! ...There is a great radio clip about Butter Tarts on the site too. Click here.

I am all for raisins too! What about you? Not in anything else, though.

This is the second or third recipe on my short list for Christmas goodies to give out this year.

Read more...

Saturday, October 30, 2010

Toffee Bars

I can't believe I have never posted this recipe before (even on my old blog, which I've had since 2005). Love this one. It's a great alternative to choc chip cookies every. But I think I like it more than cookies, so I try not to make it too often. Here is the recipe. I've tried adding toppings, like score bits or nuts, but I like it plain the best. I am thinking this year, instead of the cookie baskets I gave out to friends for Christmas last year, I am going to make a selection of squares and bars to give out instead. This one will be on the menu...as well as another recipe I was finally able to try a few weeks ago...stay tuned...

Read more...

Wednesday, October 27, 2010

Halloween Costume

This post was meant for last year. This is how organized I am...against my best intentions, I never post holiday posts on time!! So, I saved it for this year. And look at the date! Almost missed it!

I had this grand fun idea to be a bearded lady for Halloween. I have some fish net stockings, a cute black dress, 3" peep-toe sling backs, hot rollers for a 40's look, and some flowers for my hair. I was going to be as vintage glam and girly as possible, black eyes, bright red lips, perfect fake nails, everything...except...I would have a beard, like an old circus freak! So, I went to work on my beard...

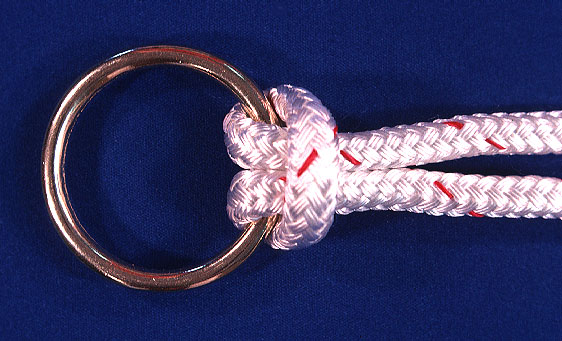
Tie random length yarn onto some clear stretchy jewelry stringy-elasticy-rubbery stuff, and make loops to hook over your ears. I tied the pieces on with this simple knot. Create the ear loops by using those little crimping beads, if you have them. I did this because I have a ton of jewelry supplies, and also it makes the beard attachments as invisible as possible. But you could also use elastic, and tie it around your head. I went a little further, and used a toothpick and separated all the yarn strands for a more realistic look, if that's even possible.

After all my careful crafting, I came to the sad realization that my bearded lady circus freak idea was hinging on my being able to be very girly (except for the beard) to get the feel I was going for. The problem is that I cannot (could not, at the time) wear high-heeled shoes yet. I am still having problems with my heel, and therefore my 40's style sling backs are not going to agree with my physical condition of my foot. I thought I could just go barefoot, but I can't pull off the look I need without shoes!

So...now I am going as a burly Canadian. The very opposite, except for the beard. No gorgeous hot roller hair-do, but instead a pony tail under a hunting camo trucker hat. No gorgeous fish nets hooked onto a garder belt, but old ratty blue jeans instead. No black peep-toe sling backs, but instead my running shoes I have to wear to physio. And of course no make-up, no nail polish, no black dress, but instead a flannel and some dirt on my face. Oh well. Maybe next year I can be a circus freak.... (and it being next year already, I am too busy to have Halloween! I am so sad :( Plus Aussies don't really get into it either. Maybe NEXT year I'll be a bearded lady...I still wear the beard every so often, I LOVE it).


Read more...

Thursday, October 14, 2010

Cookie Craft

OK, here is another fab book I've bought myself recently. Cookie Craft. There is a Christmas version too, so you still have time to get it! I can't wait to try out some of the techniques in here. I've been so swamped with work, I have a laundry list of projects to get going with, so I hope I can share some samples soon here. This book has a lot of techniques for those who've never done much decorating before, but for those who have, it also has a lot of great ideas too. And I found it on ebay, brand new for $12.60 USD.


Read more...

Thursday, October 7, 2010

Chocolate Caramel Bites


Mmm, these were a treat! Best kept in the fridge, but enjoyable no matter what!

Base:
1/2 cup plain flour, sifted
1/4 cup brown sugar
1/4 cup ground almonds
65 g butter, melted

Filling:
380 g can Top N Fill Caramel (see note)
1/4 cup smooth peanut butter

Icing:
60 g butter
150 g dark chocolate


Preheat oven to 180°C. Grease two, 12 x 1 1/2 tablespoon (30ml) mini muffin pans.
To make base: Combine flour, sugar, almonds and butter. Press 1 teaspoon of mixture into base of each muffin hole.

To make filling: Mix caramel filling and peanut butter together. Spoon over base so it is three-quarters full. Bake for 12 to 15 minutes or until firm. Remove from oven. Set aside to cool.

To make icing: Melt butter and chocolate in a small saucepan over low heat, stirring constantly until smooth. Remove from heat and spoon over each caramel bite. Place in fridge to set. When set, use a flat-bladed knife to remove from muffin pans.

Notes and tips:
Note: Top N Fill Caramel is a pre-made, thick caramel filling. It can be found in the baking aisle of your supermarket [I'm not sure if it is in North America or not].
from "Super Food Ideas" - August 2003 , Page 69

Read more...