My Instagram Feed

Wednesday, June 13, 2012

Vintage Find - Sifter


Here is another goodie. A sifter. I had one that worked OK, but was so loud I dreaded using it. I would picture metal shavings being added to my recipes as I listened to the squeal of metal on metal. This one cost $15 at an antique shop, and I'm so happy I bought it. It not only works perfectly, it's so lovely to look at.

Read more...

Friday, June 8, 2012

Sewing


I've had some time over the past many months to get some sewing done. Never as much as I would like, but at least I got some gifts done I had been planning on. Another bib... though it was planned for last August, it still made it in time for the cute babe it was meant for, sometime in October, I think. This boy's mother is my best friend from highschool. We met in grade 8 humanities (english / socials), and had classes together every year. We had a BLAST together - I have never known someone who was so in tune with me; we wore the same clothes all the time, by accident! People would ask if we were trying to be twins on purpose. We had many sleep overs, and watched every old horror movie you can think of, and I mean almost every one from the 80's. We binged on junk food like it was going out of style (and still do, when we can). We've managed to stay close, even though we also live so far apart. I think about our fun times together all the time. I miss her so much!

Another on recently sewn list is an apron for a very special girl I know. It was also planned for earlier in the year, but still made it out to her across the pond eventually.


And an apron for her very special mother, too. This special lady has been a friend to me my entire life, and I love her for it. We are cousins, who were great friends most of the time, but she had two older brothers who taught her a few things that she couldn't help but pass down to me. Lucky for me, we were usually on the same side of things, and I remember us two being bullies together! We had many adventures growing up, and she is one of the most special people I know. She also laughed her head off when I puked all over her in a road trip we had when we were young. That is someone amazing, if you ask me. I would have cried my eyes out! She's also probably the smartest person I know, talented, amazing mother & friend. And I miss her all the time.


Another apron, for the longest non-related friend I have had. We met in kindergarden (age 4), and have remained friends through many moves, and many years. We grew up running from the big kids in the neighborhood; having sleep overs and family outings together; lying to little brothers and sisters and getting in trouble for it; camping, hiking & swimming. We promised each other that we would get married to each other - I can't remember which one of us was going to be the man, but I think it was me, because I had short hair at the time. It was inconceivable that two women would get married, so we would have to trick everyone. She moved away when we went into grade 1, but we still managed to keep in contact, as our parents were friends. Then I moved away even farther in grade 3 (1,000 km), but our families still saw each other once a year, at least, most years. And though I have now moved even farther (12,000 km), we still manage to see each other every few years. It's incredible when I think of it. I grew up moving around, changing schools, always new and different friends, not many lasting the years... She is my longest friend, and I miss her every day too.


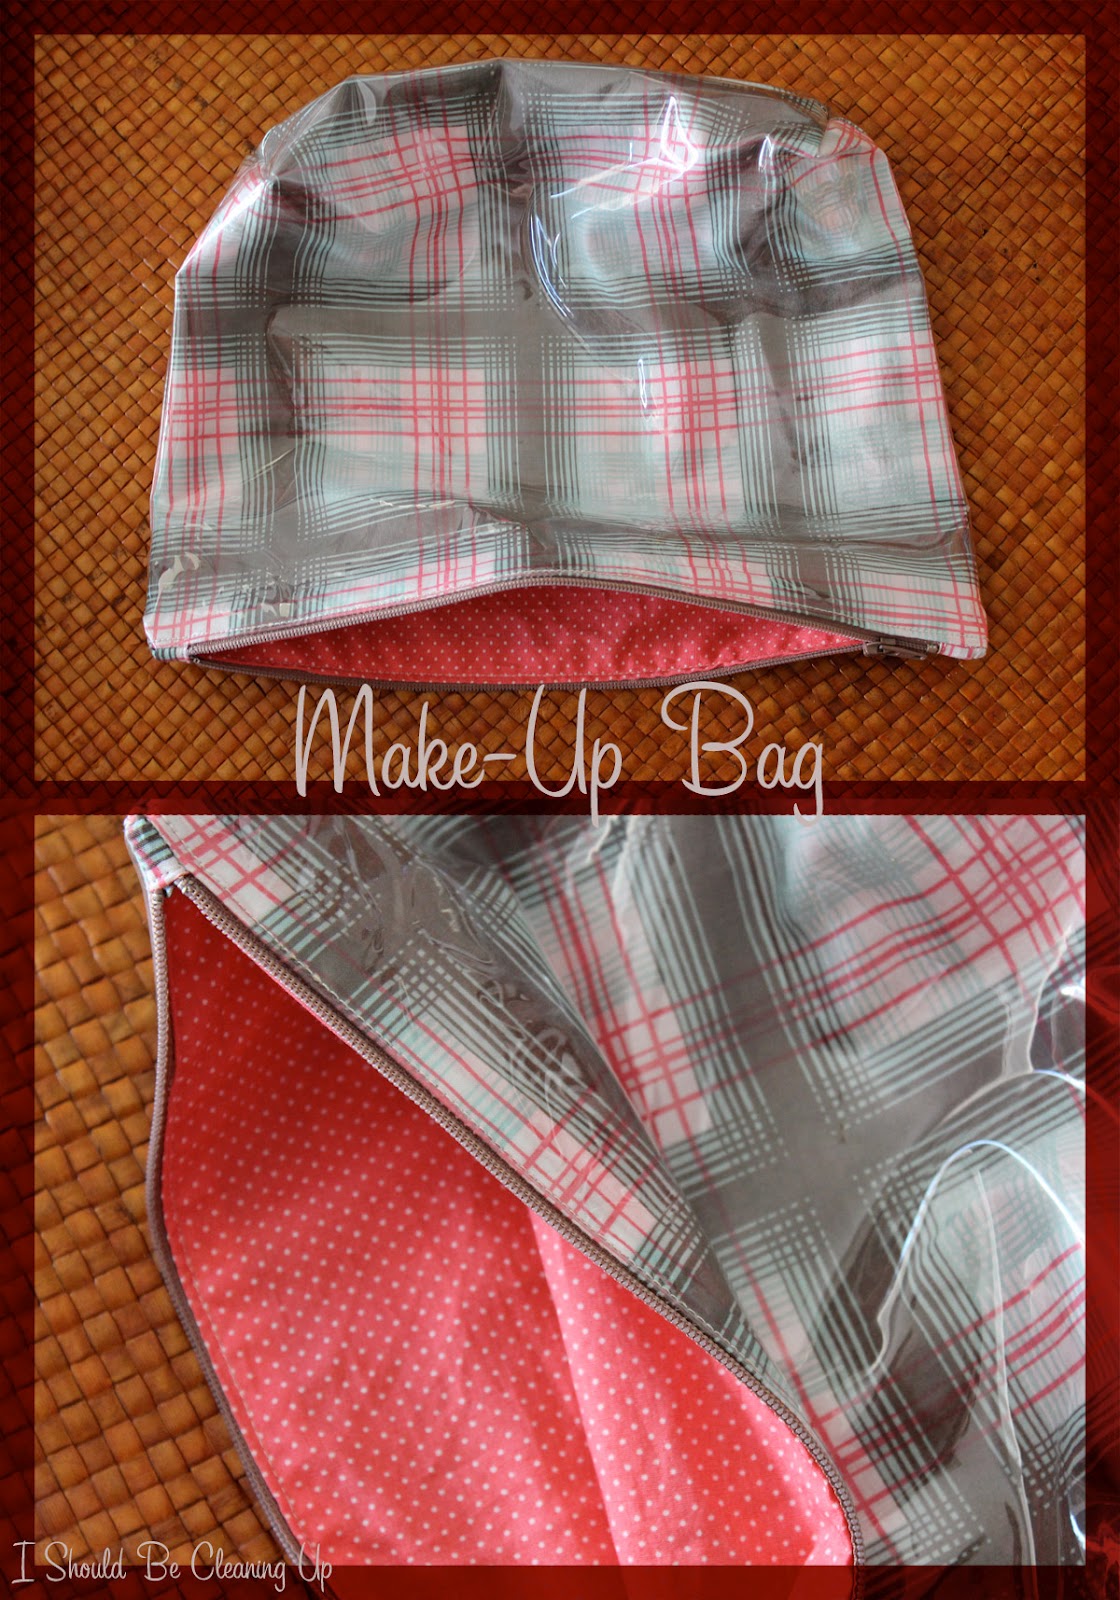
And two more make-up bags for presents & pick-me-up's. A friend of mine was diagnosed with breast cancer before Christmas. It's been a struggle for her, but she is nearing her last days of radiation, after a mastectomy & chemo. She's an amazingly strong, easy-going, optimistic and, most importantly, Christian, woman who I really admire. How do you tell someone you care when they are going through that? I feel like a gift is a lame attempt, but then I think of how special it is to get a package when you weren't expecting it. Even if it can lift someones spirits for a few minutes, it's worth it. I sent her a make-up bag with some word puzzles for the long waits in waiting rooms, and a cookie-in-a-jar mix, for a day when she might feel like eating something home baked, and it wouldn't require too much effort.


Read more...

Saturday, June 2, 2012

Caramel Date Cupcakes

I've been away again, for quite some time, I see. I've been back a few times, written a post or two, and then not finished it for whatever reason, thinking I would get back to it soon... I guess always think my breaks will be shorter than they end up being. But I suppose if breaks mean my life is busy, then that's not such a bad reason to stop blogging. But I've been itching to get back on here again. I keep meaning to add more content, even if it's without commentary. I'd like to add more of a photo-journal type thing on here too. I love looking at my old blogs, and remembering the lovely days out and about, or cute creatures I tend to photograph...


I would still like to add to my list of recipes I have growing here.  My oven was out of commission recently, for over 2 months, and I was devastated. I had to get a little creative, so I tried a few different, non-oven, recipes I've been a little nervous to try... a few worth mentioning here.

I also keep trying to remember a favorite recipe for this-or-that and realize I haven't documented it here yet. I'd like to keep tabs on these things in some sort of organized way...not loose papers pinned to my cork-board... or in a pile on top of my printer (printers make great shelves if you use the cassette feeder!)
AND FINALLY, here is a fantastic recipe I slightly changed from a Women's Weekly cookbook I received for my birthday last year. I pretty much omitted the chocolate from the original recipe, and then made a caramel glaze instead. Chocolate, as much as I love it, seemed wrong in this instance (there is 1/2 cup semi-sweet / dark chocolate chips added to the batter, if you feel up for it, and a chocolate glaze icing in the original recipe).

Ingredients:
Cakes:
1 3/4 cups (250g) seeded dried dates
1 1/3 cups (330ml) boiling water
1 tsp baking soda / bicarbonate of soda
125g (just less than 1/2 cup, approx*)  butter, softened
3/4 cup (165g) packed brown sugar
3 eggs
1 1/2 cups (225g) self-raising flour / self-rising (or use this recipe to make it, if you don't have any), sifted
‡°‡
Icing:
60g (1/4 cup, approx) butter
1/2 cup (110g) packed brown sugar
2 tbsp cream (or milk)
3/4 cup (120g) icing sugar


Method:
1. Preheat over to 180°C / 160°C fan forced / 350°F.
2. Prepare16 cupcake pans with liners or butter / grease.
3. Bring dates and water to a boil in a small saucepan. Remove from heat, stir in soda, and let sit for 10 minutes. Blend mixture until smooth, and cool another 10 minutes.
4. Beat butter and sugar until light and fluffy. Add eggs, one a time, beating beating between each addition.
5. Stir in flour and date mixture.
6. Fill cupcake tins, and bake for about 25 minutes. Allow to cool 10 minutes before turning onto wire rack.
7. Prepare icing by stirring butter, brown sugar and cream in a small saucepan over heat until sugar dissolves. Then bring to the boil, and simmer, stirring constantly, for 2 minutes. Remove from heat, and slowly poor into icing sugar, beating as you go, to avoid lumps.
8. Spread onto cakes, and enjoy :)
 

 So moist, and just the right amount of density to not be so cupcake-y. This could be a real dessert! With some vanilla ice cream, of course.


* the reason I have so many measurements, is that I know this blog is read from mainly Australia & North America, and therefore everyone can use these recipes. I found it very frustrating when I first moved to Australia to find that most recipes required a scale. I still rarely use one, so I have found ways to convert most measurements. Also, Australian & North American measurements are slightly different (Tbsp size, etc), but they usually don't make a difference in the outcome of the recipes - I have never noticed a difference.

Read more...

Monday, July 25, 2011

Bibs

I've been sewing these baby bibs for a few years now...I found a great pattern online, from Nicole Mallalieu. She sells bag making supplies, and other pattens too, but this pattern was free to use.
These 3 pink ones are for my new niece, and I have to say I love the un-baby-ish-ness of them.  My sis picked out the materials she wanted (good quality cotton), all in coordinating colours, so I could use one material for the bias tape. I used good quality terry cloth on the back, which makes for a thick and sturdy bib. They feel so nice!


These are older ones I made 3 years ago, which are cute, but I can see how I have now changed to a simpler look; less cluttered, more streamlined. I also have changed the pattern to suit a less crafty-looking bib too - I use less bias tape, depending on the materials' patterns, and I also do the arm holes differently, depending on how much sewing I want to do.


Then I have a few others I made late last year to sell at some markets. I also really like these designs as well. I keep making more than enough, so I can one day put all my stuff on etsy, but for some reason, I just never do it! And in the meantime, everyone just keeps having babies, so I just keep giving more away...5 more (not including my sister) to give away over July/August, not to mention a few earlier this year already.


The black ones below have a pattern of little grey skulls all over them:


Read more...

Monday, July 18, 2011

Some Sewing...Gift Bags

I've been very busy with work, but have been managing to have a day to myself every few weeks, for the most part, to get some sewing projects done. Feels nice to sew for me. Well, for me - for others in this post...but I am working on a dress, and also a new retro-style blouse, which I will share here too. 


The following projects I finished a few months ago, and gave them away in April. I had planned to sew these for stocking stuffers for my sisters, and mom, but it didn't happen on time! I also normally give the exchange students my in-laws take in a gift before they go home, but I also didn't get that done before Christmas either! So, everything was sent late. I made these little pencil cases / make-up bags from some scraps I bought ages ago. For the students I bought cute stationary supplies and some little toiletries, and for my family some soap and candles. 


The bags are made from a simple pattern I quickly drew out myself with skills learned from a super cool book called "The Bag Making Bible" by Lisa Lam. I also used this tutorial as a base to work from. I have many of her free tutorials (all on her blog), and have followed her blog for years. This book has so many patterns, and teaches so many skills. I altered her tutorial slightly to get a cleaner look at the zipper ends, and I also added a layer of clear vinyl to make the bags a little more substantial, and suitable for make-up.


I bought a silicon foot for my sewing machine to sew over the vinyl, and then realized I needed a silicon ZIPPER foot, which I didn't have, so I placed tissue paper over the vinyl, and sewed that, tearing away the tissue paper after the stitch was done. Not simple, but still worked well. Otherwise, your foot will stick to the vinyl, and your work will not slide through the machine.

Here are a few I have made so far:

Read more...

Thursday, July 7, 2011

Mexican Pizza

I have to admit, this idea didn't sound all that great to me, but now I am convinced you can add anything to a pizza and be happy. I think the sour cream makes it.

Here's what I did...

Ingredients:
Ground Beef, browned
Onion, diced
Red Pepper (Capsicum), diced
Garlic, diced
Taco Seasoning
Tomato, thinly sliced
Green Onion, diced
Olives, sliced
Cheese
Pizza Sauce (or make your own with tomato paste, garlic, pepper, salt, onion powder, rosemary & Italian herbs)
Pizza bases*
Sour Cream

* not the best photo, but food photos are hard to take here, as it's always dark by dinner time
Method:
1. Brown beef, onion, red pepper, and garlic in a pan until cooked through. Add taco seasoning and cook as per instructions on package (or make your own, add some water, and let the mixture simmer until reduced).
2. Meanwhile, preheat oven to 350°F / 180°C (and pre-heat pizza stone if you have one).
3. Cut up all other toppings.
4. Prepare pizza base with tomato pizza sauce (we also used a BBQ Tomato sauce, and it worked nicely)
5. Top pizza with some ground beef, and then add the other veggies, and then the cheese.
6. Bake for anywhere from 10 - 20 minutes, until cheese is beginning to brown.
7. Remove from oven, and top with small dollops of sour cream, and serve immediately. Only add sour cream to the pieces you will eat now...not too sure how left overs would look tomorrow...

*I used a thin-crust store-bought pizza crust base. It wasn't too bad. We wanted to try a thin crust, as my usual recipe is hard to get nice and thin. But, if you want a homemade taste, go for the handmade base. It's simple, and quick. Here is the recipe I always use.

Read more...

Wednesday, June 1, 2011

Be Right Back

I want to blog. I really really really do. I think of fun things to blog about all the time. I just don't have the time :( I am working almost non-stop. I know that sounds like an exaggeration, but I don't even cook or clean at all anymore. I work, sometimes do exercise, eat and sleep. Maybe that will give you an idea...working on a new business that is getting busier and busier, while keeping your "day" job is rough. Right now, I am not busy enough to quit the day job...I hope I will be soon,  but until then I continue to juggle. And not do anything for myself (I know, I'm going to burn out, I'm trying to pace myself). I have not baked since...I don't even know when... I have sewing projects sitting on the kitchen table, that I don't eat at, for months now.  I really want this new business to work, so I have to just push through. I might fail, but I have learned a lot along the way. I was tempted to delete the blog...but I WANT to come back...Thanks for looking in on me, hopefully things will slow down a little soon.

Read more...